I was recently asked to help someone build a “Retro Gaming System”. While thinking of the best way to do this, I figured that I would like to give them something that they can come back to and do this on their own; at anytime. There are plenty of other tutorials and ways to go about this, but this one is mine. Please leave any feedback through the site should you have any.
Parts List
- Raspberry Pi 3 (Power supply and case are a given)
- Micro SD Card (32GB or 64GB to fit all the roms)
- Controllers
- NES (dont buy these, just get 4 SNES controllers)
- SNES
- N64
- Sega Genesis
Programs List
Both
- Latest Version of Raspbian
Windows
Mac
SD Card Configuration
Download the latest version of Raspbian, you can use torrent or HTTP to download this. Torrent will be quicker, but will require another program.
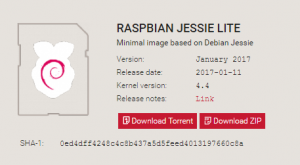
The version at the time of this writing is Jesse. For this setup we will use the LITE version of Jesse as we do not need a Desktop GUI. This will help to save space on the SD Card among other things.
You can find the latest version on Raspberry Pi’s site.
Windows
Extract the zip that we just downloaded.
Install Win32DiskImager utility if you don’t have it installed already. (You can download it on the utility from the Sourceforge Project page)
Insert the SD Card into the PC.
Run Win32DiskImager and select:
- Rapberry pi image we just extracted
- SD Card’s Drive Letter
Select Write!
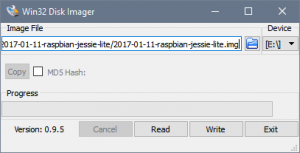
Safely Eject the USB Drive and remove it from the PC
Insert the SD Card into the Raspberry Pi.
Mac
Extract the zip that we just downloaded.
Insert the SD Card into the PC.
Follow this artcle provided by Raspberry Pi
Raspbian Initial Installation & Configuration
Plug a Keyboard into one of the USB slots, a Monitor/TV into the HDMI slot and an Ethernet Cable into your Raspberry Pi. We will be downloading packages from the internet and using SSH for some of this, so Ethernet is required. (Note: You can use WiFi if you want, but that will not be covered in this tutorial, more info here)
Power on your Pi by plugging the Micro USB Power Cable in.
You will see your Pi boot into a notification that the File System is being resized. This is an automated feature that expands the filesystem to take up your entire SD Card upon the first boot. The server will then reboot.
After the reboot completes, you can now login with the following credentials:
- Username: pi
- Password: raspberry
First things first, lets update that password, you can do so by entering the following:
sudo passwd pi
Here you will enter your new password twice to confirm it has been entered correctly.
Run
sudo raspi-config
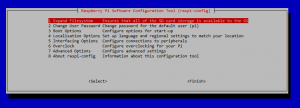
Select – 1 – Expand Filesystem, Hit [Enter] and proceed through the steps to get back to the selection screen:
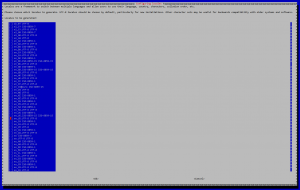
Generate proper locales. (This step is for persons with ANSI/USA Keyboards)
Select – 4 – Localisation Options > I1 – Change Locale > Deselect en_GB.UTF-8 UTF-8 and select en_US.UTF-8 UTF-8
Change the keyboard layout
Select – 4 – Localisation Options > I1 – Change Keyboard Layout > Generic 101-Key PC > Other > English (US) > Enter > Enter
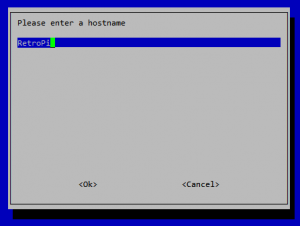
Select – 7 – Advanced Options > A2 – Hostname Enter a new hostname for this Pi:
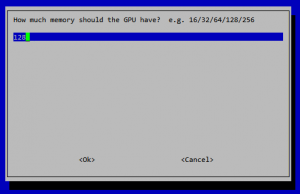
Select – 7 – Advanced Options > A3 – Memory Split Change the value to 128 if you have a Pi 3:
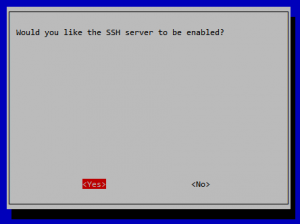
Select – 5 – Interfacing Options > P2 – SSH > Yes Enable SSH so we can access the Pi remotely:
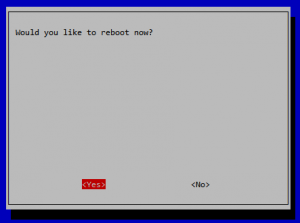
Change anything else you see fit, select Finish and reboot your Pi:
After the reboot completes, log back in at the console one more time,
run
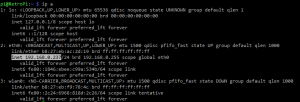
ip a
and get the IP from the Ethernet connection labeled eth0
Remember or write down that IP, then type in
logout
to logout.
Install RetroPie
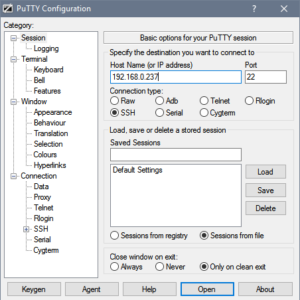
From your computer, open Putty and enter the IP you got from the last step and click Open
If you receive a certificate warning, ignore it and proceed.
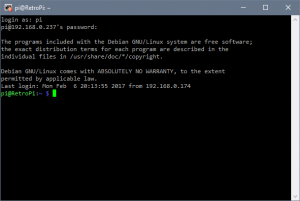
Enter your username and password to login. You will then see a nice blank screen as follows:
Time to update your Pi!
Run
sudo apt-get update && sudo apt-get upgrade -y
This may take take some time, so feel free to walk away for 5 minutes or so and come back.
Install the prerequisites for RetroPie:
sudo apt-get install -y git dialog lsb-release
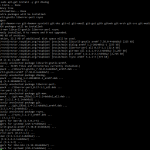
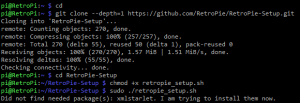
Download the latest version RetroPie and begin the installation:
cd
git clone --depth=1 https://github.com/RetroPie/RetroPie-Setup.git
cd RetroPie-Setup
chmod +x retropie_setup.sh
sudo ./retropie_setup.sh
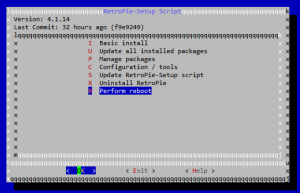
After this runs, a GUI portion of this install will begin.
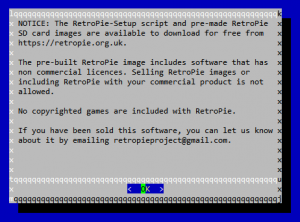
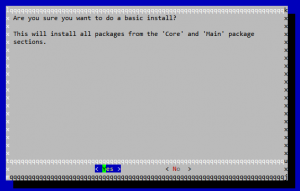
When it comes to the following screen, Select OK.
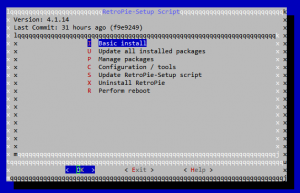
Select Basic Install > Yes
This will run through an install, it will take some time.
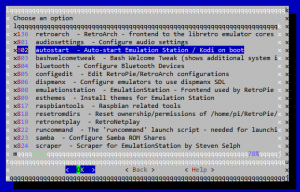
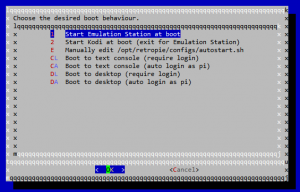
Once that completes, select Configuration / Tools > 802 – autostart > 1 – Start Emulation Station at boot
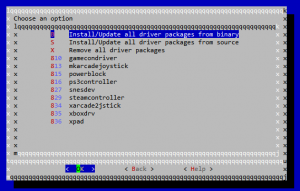
Install drivers by selecting: Manage Packages > Manage Driver Packages > Install/Update all driver packages from binary
Finally, reboot the Pi!
ROM Installation
Windows
Now it’s time to move ROM’s you own, to the Pi. You don’t own any ROMs? Don’t worry, you’re resourceful and I have a link for you to Follow.
Install WinSCP if it is not installed already.
Run WINSCP.
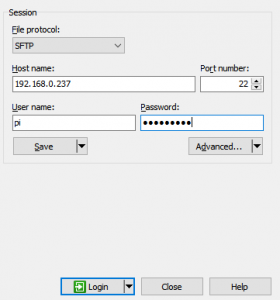
Connect to your Pi with the IP from earlier and the password you configured as such:
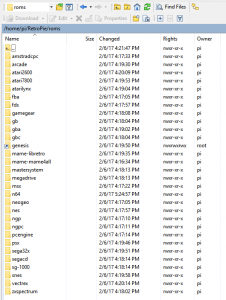
Navigate to RetroPie > roms and you will find a list of all the available systems that you can play.
For this tutorial, we will be dropping roms in:
- megadrive (Sega Genesis)
- n64 (Nintendo 64)
- nes (Nintendo Entertainment System)
- snes (Super Nintendo Entertainment System)
Now you will simply drag and drop your ROMs into the desired destination.
Once all the ROMs have finished moving, reboot your Pi and go back to it.
Mac
(to come at a later date…)
Time to Play!
If you have not rebooted since adding the ROMs, do so now.
sudo reboot
Now that your Pi has been configured and has ROMs on it, you are ready to configure your controller and start playing.
When your Pi reboots, if you set it up to auto-run as described, it should be up and running after the reboot.
Controller Configurations are as follows:
NES
Hold a Random Button to start.
| RetroPie | Controller |
|---|---|
| D-PAD UP | D-PAD UP |
| D-PAD DOWN | D-PAD DOWN |
| D-PAD LEFT | D-PAD LEFT |
| D-PAD RIGHT | D-PAD RIGHT |
| START | START |
| SELECT | SELECT |
| A | A |
| B | B |
| X | [BLANK] |
| Y | [BLANK] |
| LEFT SHOULDER | [BLANK] |
| RIGHT SHOULDER | [BLANK] |
| LEFT TRIGGER | [BLANK] |
| RIGHT TRIGGER | [BLANK] |
| LEFT THUMB | [BLANK] |
| RIGHT THUMB | [BLANK] |
| LEFT ANALOG UP | [BLANK] |
| LEFT ANALOG DOWN | [BLANK] |
| LEFT ANALOG LEFT | [BLANK] |
| LEFT ANALOG RIGHT | [BLANK] |
| RIGHT ANALOG UP | [BLANK] |
| RIGHT ANALOG DOWN | [BLANK] |
| RIGHT ANALOG LEFT | [BLANK] |
| RIGHT ANALOG RIGHT | [BLANK] |
HIT A to finish!
SNES
Hold a Random Button to start.
| RetroPie | Controller |
|---|---|
| D-PAD UP | D-PAD UP |
| D-PAD DOWN | D-PAD DOWN |
| D-PAD LEFT | D-PAD LEFT |
| D-PAD RIGHT | D-PAD RIGHT |
| START | START |
| SELECT | SELECT |
| A | A |
| B | B |
| X | X |
| Y | Y |
| LEFT SHOULDER | LEFT SHOULDER |
| RIGHT SHOULDER | RIGHT SHOULDER |
| LEFT TRIGGER | [BLANK] |
| RIGHT TRIGGER | [BLANK] |
| LEFT THUMB | [BLANK] |
| RIGHT THUMB | [BLANK] |
| LEFT ANALOG UP | [BLANK] |
| LEFT ANALOG DOWN | [BLANK] |
| LEFT ANALOG LEFT | [BLANK] |
| LEFT ANALOG RIGHT | [BLANK] |
| RIGHT ANALOG UP | [BLANK] |
| RIGHT ANALOG DOWN | [BLANK] |
| RIGHT ANALOG LEFT | [BLANK] |
| RIGHT ANALOG RIGHT | [BLANK] |
HIT A to finish!
N64 – (Mupen64plus)
Hold a Random Button to start.
NOTE: On this controller, I sacrifice the LEFT TRIGGER for SELECT so it can be used to exit the emulator in conjunction with the start button.
| RetroPie | Controller |
|---|---|
| D-PAD UP | D-PAD UP |
| D-PAD DOWN | D-PAD DOWN |
| D-PAD LEFT | D-PAD LEFT |
| D-PAD RIGHT | D-PAD RIGHT |
| START | START |
| SELECT | [BLANK] |
| A | C-DOWN |
| B | A |
| X | C-LEFT |
| Y | B |
| LEFT SHOULDER | Z |
| RIGHT SHOULDER | RIGHT SHOULDER |
| LEFT TRIGGER | LEFT SHOULDER |
| RIGHT TRIGGER | [BLANK] |
| LEFT THUMB | [BLANK] |
| RIGHT THUMB | [BLANK] |
| LEFT ANALOG UP | ANALOG STICK UP |
| LEFT ANALOG DOWN | ANALOG STICK DOWN |
| LEFT ANALOG LEFT | ANALOG STICK LEFT |
| LEFT ANALOG RIGHT | ANALOG STICK RIGHT |
| RIGHT ANALOG UP | C-UP |
| RIGHT ANALOG DOWN | [BLANK] |
| RIGHT ANALOG LEFT | [BLANK] |
| RIGHT ANALOG RIGHT | C-RIGHT |
HIT A to finish!
Sega Genesis
Hold a Random Button to start.
| RetroPie | Controller |
|---|---|
| D-PAD UP | NOT TESTED |
| D-PAD DOWN | NOT TESTED |
| D-PAD LEFT | NOT TESTED |
| D-PAD RIGHT | NOT TESTED |
| START | NOT TESTED |
| SELECT | NOT TESTED |
| A | NOT TESTED |
| B | NOT TESTED |
| X | NOT TESTED |
| Y | NOT TESTED |
| LEFT SHOULDER | NOT TESTED |
| RIGHT SHOULDER | NOT TESTED |
| LEFT TRIGGER | NOT TESTED |
| RIGHT TRIGGER | NOT TESTED |
| LEFT THUMB | NOT TESTED |
| RIGHT THUMB | NOT TESTED |
| LEFT ANALOG UP | NOT TESTED |
| LEFT ANALOG DOWN | NOT TESTED |
| LEFT ANALOG LEFT | NOT TESTED |
| LEFT ANALOG RIGHT | NOT TESTED |
| RIGHT ANALOG UP | NOT TESTED |
| RIGHT ANALOG DOWN | NOT TESTED |
| RIGHT ANALOG LEFT | NOT TESTED |
| RIGHT ANALOG RIGHT | NOT TESTED |
HIT A to finish!
Hotkeys and special buttons of Note
| Key | Description |
|---|---|
| SELECT + START | Exit emulator. |
| SELECT + L1 | Load state. |
| SELECT + R1 | Save state. |
| THUMB LEFT | Enable memory expansion pak. |
| THUMB RIGHT | Enable rumble expansion pak. |
